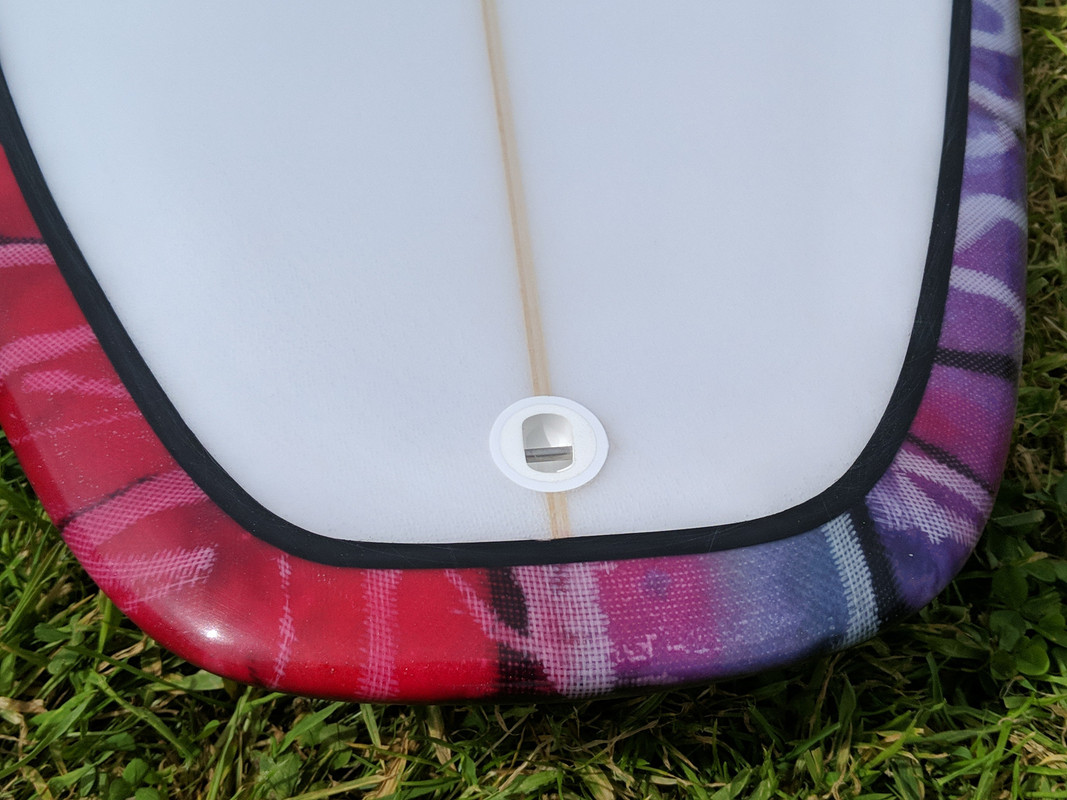
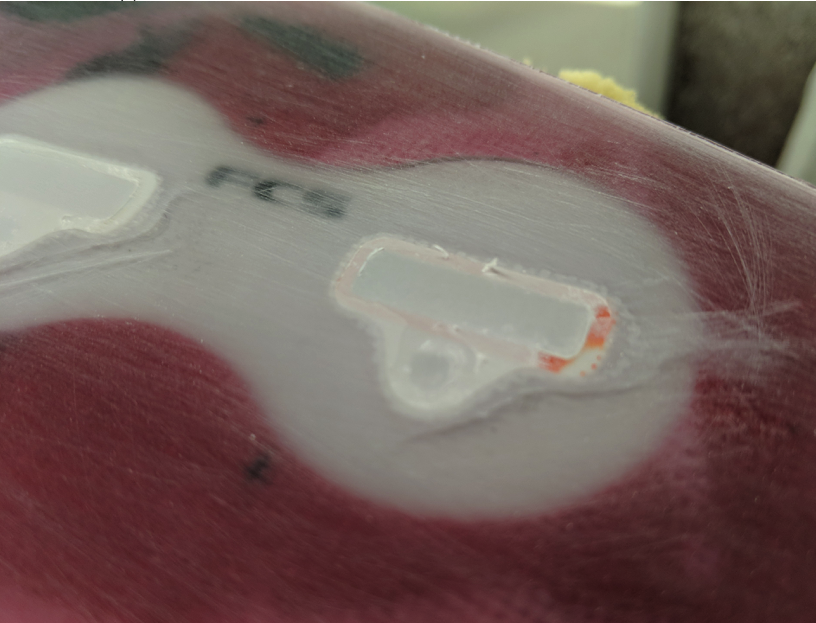
I had a bit of an accident and put a resin smudge on my lovely clean deck form. It happened (and has before) when cutting the lap line. I must be letting it cure too hard before cutting, I figure I would rather than than risk doing it too early and ruin the lamination. I used to do it earlier and I could lift the glass off the rail while doing it, didn’t like that at all so I leave it later now but maybe i wait too long. https://postimg.cc/WDVDy55T - What would be the best approach to cleaning up that smudge of resin? It’s fully cured now so should I just bend up a razor and shave it off as carefully as possible? I have done that in the past and I never managed to make it invisible (with tinted resin going over). Any tips appreciated.
As you can see I get bleed under the tape line, every single time. It’s annoying but I just do pin lines routinely due to that. I use Indasa tape from Seabase UK which all the pros there use. I know 233 is expensive but I am tempted to try it. The Indasa tape is supposed to be heat resistant etc, but I don’t find it very sticky. In fact quite often once the deck laps are done and board is upside down for a few hours while I prepare for glassing, it often drops off and i have to stick it back on just before glassing. Anyone else use Indasa tape? Is that bleed normal or I should keep trying to prevent it?
It’s important to blow the blank off and get is as dust free as possible. You need dust-free because otherwise the tape won’t stick. Use good tape, and really press it down to get a good seal. I use a razor blade like a squeegee to do it, but anything that’s flat will work. As for 233 being expensive, it’s not more expensive than the amount of time/effort you’re going to spend cleaning up after less-than-adequate tape.
You also might consider masking off the dry side of the board to keep resin off of it until after your lamination sets up. At least until you get your glassing technique down well enough that you’re not overrunning your tape. As for what to do now that you have smudges, one thing you can do is incorporate the imperfection into your cosmetics apply a few more such smudges and hit the entire side with a clear cheater coat to even it out.
Thanks. I should have said… I do everything you said. I am obsessive about dust removal and pressing down the tape. I definitely have no dust and the tape is pressed firmly down almost to the point of denting the blank. I guess the tape is to blame, people have told me they use it but for all I know the could just say that, or they could use it for everything BUT that all important first line next to the lap, for that maybe that use 233. I will get some thanks.
Wasn’t quite sure what you meant there, although I do get the idea of being creative with it. I am doing a totally clear deck and would like to remove it, if I am very careful it won’t show without extremely close inspection and he will have a tail pad on this board I am now told so fingers crossed nobody will know (except me, grr!).
You mention cheater coat - I can never work out what that is. I saw some colour tint resin jobs on youtube where they do the colour work, squeegee it, and then pour clear over and run that into the glass behind the colour. Is that necessary? (i never do it but i get decent colourwork, although my board could be lacking in some way I am not aware of). Other people I have seen do the lam, let cure, then brush on a coat of clear, and i have heard that referred to as a cheater coat. My understanding is that a cheater coat is basically an extra layer of resin to make it less likely that burn throughs happen when sanding, is that right?
There are different names for it, but I’m referring to painting the exposed portion of the blank with resin and letting that set up before lamination. Just enough to seal the blank. If you put pigment or tint into it we would call that a foam stain. Again, just enough to seal the blank. Some people routinely seal their blanks before lamination in order to keep the resin in the lam from excessively draining into the foam.
For what you’re trying to do, I don’t see any way to get the exposed foam clear again without sanding into it. Personally, I wouldn’t do it. I’d just embrace and incorporate the smudges into the look of the board. Homebuilt boards have their own charms, one being is that these imperfections show that that board didn’t come off a machine or out of a factory.
I use Indasa and never have any of those problems and I mean never. It sounds like to me you have a couple of things going on. 1. Blow the blank of throughly. No tape will stick to foam dust. 2. Press the tape down firmly all the way around . Use a stir stick, tongue depreeor, thimble, seam roller, whatever is available. 3. The third thing and most likely is that the tape you purchased is from an old batch. If any tape (no matter the quality 3M 233 included) is dated or been kept in extreme weather for a period of time; It will not stick. I sell and use Indasa and swear by it. I have used 3M 233 as well. Indasa is in my opinion a better tape for half the price. 3M tape and sandpaper is so overrated it’s ridiculous. The last time I ordered 233 it had sat in a warehouse somewhere so long it wouldn’t come off the roll. 3M changed the adhesive on their tape a few years back and they have had problems ever since. One sheet of Indasa sandpaper will do what it takes 2 or 3 sheets of 3M or Norton to do.
aaah i understand now! I had no idea that’s what you meant, I have never heard of that! Clever idea too. I usually do colourwork with the lam so not sure I would do it often but on a clear board I could. I get a lot of trouble with moths and small flies where i am. I have just this minute finished a clear deck lam on that board, it was PERFECT, while I checked for bubbles etc after it started curing, i saw a moth had been dancing on the clear deck, leaving his dust in the lam. GRRR. I have had this before and razor out the dots and piece in a tiny bit of glass.
I have done some extemely adventurous pin lines (i.e. entire side covered with em!) after finding out that you can’t sand gold glass without losing the gold, doh!!
That’s damn interesting thanks v much. Yes, the sand paper is friggin superb value for money, and I also agree 3M stuff is basically priced for the brand now and rarely worth the extra spend. Like so many big names from decades gone by, they are little more than just that, the NAME any more. You could be right about dates, but the place I get it sells out regularly and gets stock every month so I can’t see that being the problem and I know the other two aren’t the problem (i de-dust like a demon, and tongue depress, roll, razor back, finger about 10 times before I glass!) I don’t get problems every single time though. I wonder if it could be the type of foam/blanks. Anyway, nice to know someone else swears by Indasa, I will stick to that, sure don’t fancy paying for 3M. thanks
Not familiar off the top of my head but are you using the equivalent to one inch or 1 1/2" inch. Because for a cut lap I reccomend the 1 1/2". Being wider it has more area to stick to the surface. If I am doing tight curves, I will go around with 1/2 or 1" and the put 1 1/2" on the inside. Just try to do what we were discussing earlier about grinding laps. Take a little more time with the first step before you move onto the second. Regarding tape. Here in the U S there are shortages of products in stores like Home Depot and Lowe’s. A lot of products are imported. Indasa is a product of Portugal. Due to Covid Virus some shipments have lagged. Your batch of tape may have sat on a shelf in Portugal for months. I would go back to my supplier and see what they say. They can research batch #'s that are on each carton and tell you how old the stock is.
since i use indasa masking tape never have a problem. Stick well, for long time on all kind of material and more over peel off without residue even after long time. Never use their sandpaper but i will try it next time for sure.
Helteragain - I agree with gdaddy on the cheater coat and attest it works very well. I did this with a board with colored bottom and clear top without any bleed through at all using regular 3M tape (hadn’t learned about 233 yet).
the key is to get as thin a film on there as possible. I used a squeegee only as the brush was still a little thick. To cover the entire top of a 6’2" retro fish I only mixed 4-5oz of resin. That was on wood… foam might be more/less absorbant.
On that smudge… I’ve used a sharp razor plane or even a surform to hack the smudge away, after full cure, followed by a sanding block. If having the deck ever so slightly asymmetrical is a concern, sand down the other side too. Believe me, I’ve fixed worse and nobody noticed. In one case, this method was used on a professional (very expensive) longboard with a ‘tiger stripe’ lamination. I was merely assisting on that one but watched as the glasser fixed it beyond noticeability. I won’t mention any names here or what kind of board it was… the fix was done exactly as I described after I hit the exposed portion of the deck with my sloppy squeegee technique.
Use the best tape you can get. Short cuts are often false economy when it comes to materials and supplies.
Thanks Curlz. I read Gdaddy’s post again as I didn’t realise quite what he meant until now. I have seen so many videos of colourwork in the lam, and quite a few people seem to laminate with the colours, squeegee it good and tight, THEN pour some clear resin over the top. I assume that’s a kind of cheater coat to prevent burn throughs later?
But this idea of ‘sealing’ the blank with resin and squeegee is cool. I hadn’t ever heard of that and it makes a lot of sense to prevent bleed as the foam is already set with a thin film of resin. I would be a bit worried about it affecting the colourwork, unless the whole board was done top and bottom, or if only sealing the deck area (inside the colourwork for a clear deck, coloured bottom board like i just made) then I assume a good masked off tape line where the bottom lam will lap to, that would work but would have to be very accurate. Maybe the blanks I get are very soft/absorbent so it’s not leaking under the tape as much as through the gaps in the foam under it (i.e. not something to blame the tape for). Interesting stuff though thanks
Fixing that kind of stuff is difficult. Scratching, screening or scrubbing is just about the only recourse. Better to work on improving technique and be on the lookout for our absent minded mistakes. Live and learn. Once we’ve made a mistake, better to make sure we don’t repeat the same mistake twice. John’s advice on short cuts is sound, solid advice. Pay heed.
Thanks John. I pretty much did what you said there, i used a sharp razor and scraped sideways (microscopically!) and then managed to blend it out before glassing with 240 grit. If you look VERY hard through the clear deck glass you can just about make it out, but I suspect that’s only because I know it’s there, I don’t think anyone else would see it. Successful cover up job!
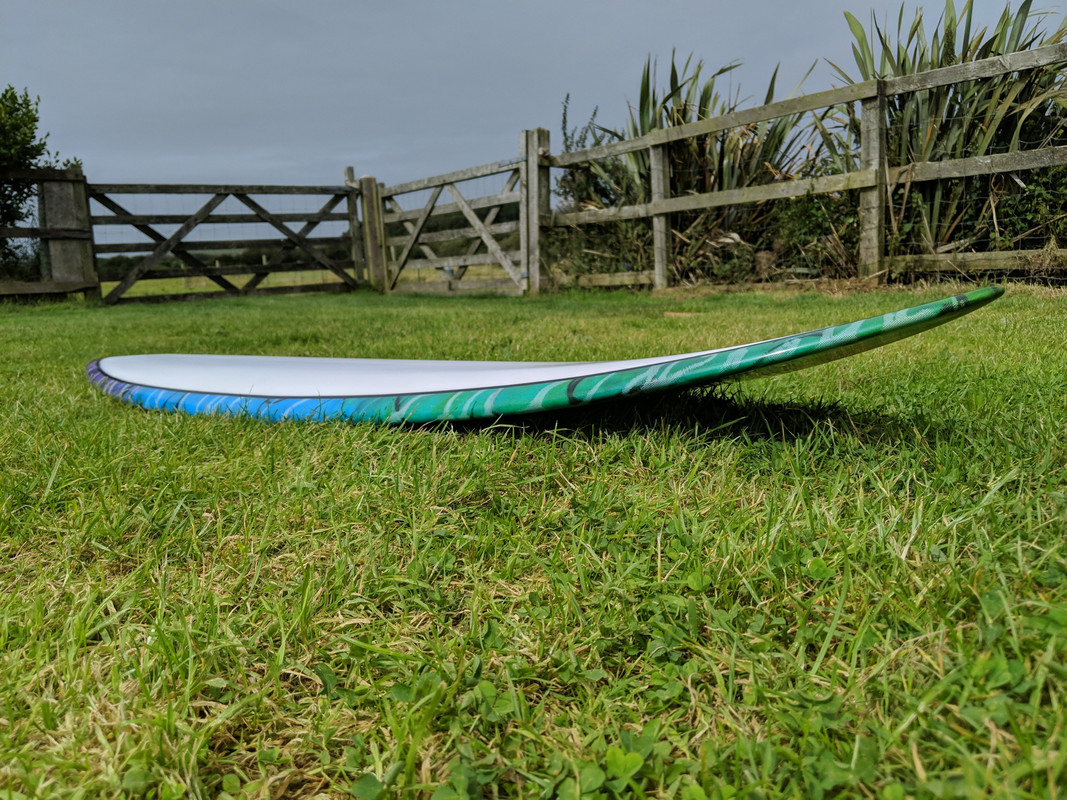
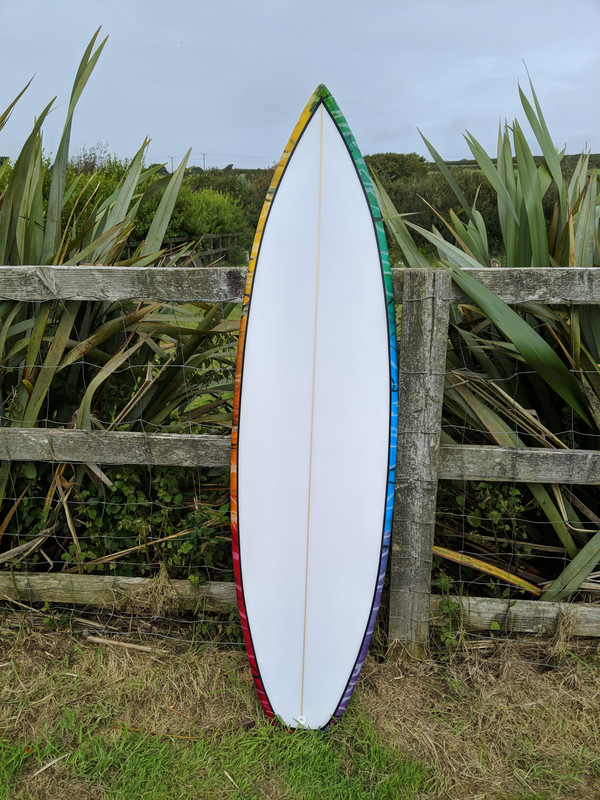
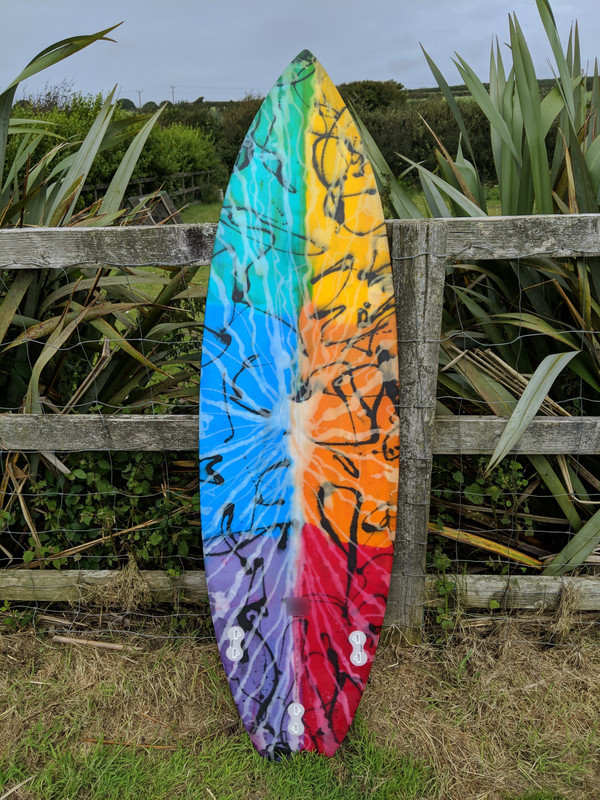
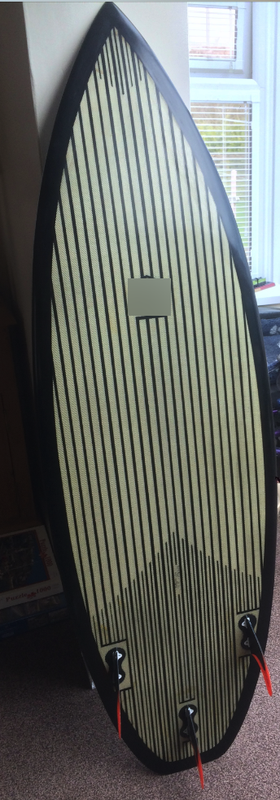
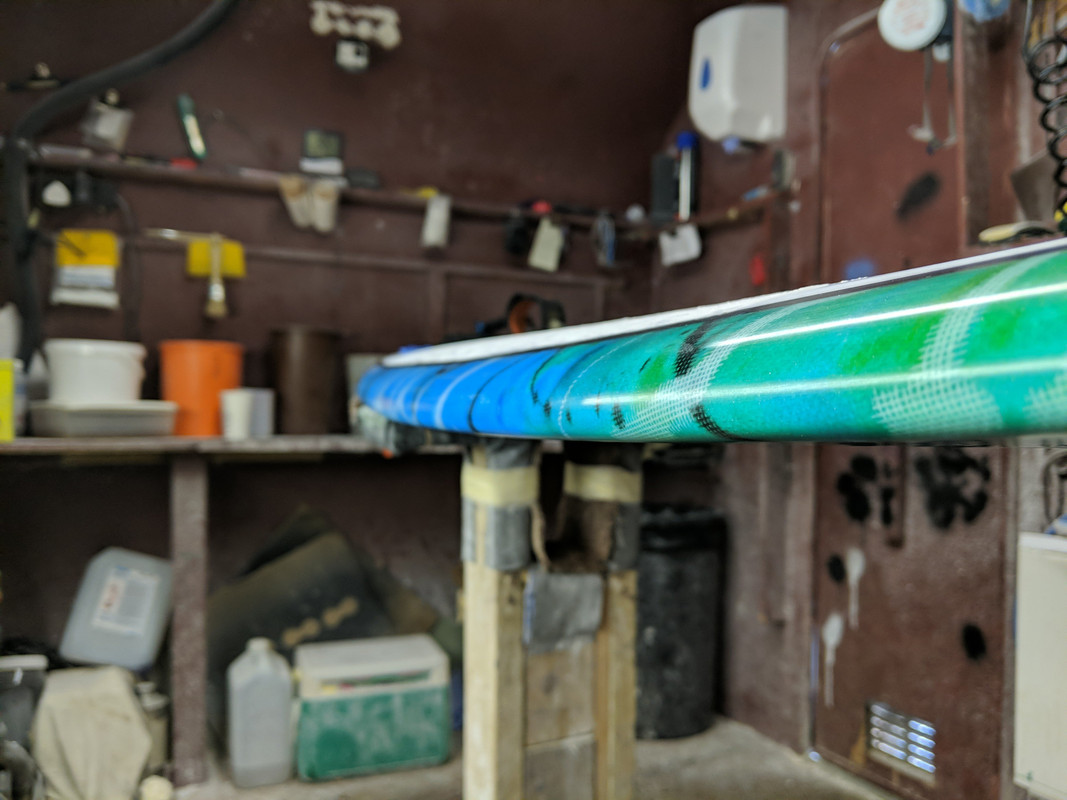
I finished sanding at 4am. Left the deck at around 120 or 180 (can’t remember which). Colour work on bottom he wanted left coarse too so I did that to 400, just enough to show off the pride flag he seemed to want on this board :D, but not polished to make it smooth as glass (he hates trying to clean off wax on shiny boards). However, the little swine (my son) wanted the TOP of the rail polished as well just to (and including) the pin line (he chose the fat pin line, yuk!). So I spent hours polishing with a fingertip, took twice as long as machine polishing a whole damn board! I quite like the shape though and I managed to get the desired rocker which is a first for me. Thanks to everyone here for all the guidance and tips, you in particular John.
A few pics below while he waits to surf her!
Oh, that reminds me… this has been discussed before and I have read everything I can. But I still wish there was someone who could give a definitive (technical/chemical) answer… I use UV resin (with a bit of MEKP to kick it well enough to pick up and carry outside). The general view is that 2 weeks minimum is needed before a board should be used. But with UV resin and say a full week in the sun, I strongly suspect it’s as strong after even just a full day in the sun as it will be after 2 weeks. Does anyone know or have any experience on comparisons of hardness/durability after only giving a UV board a few days to cure? I know the safest bet is always longer, but it’s near the end of the season, he has a new surf buddy and is dying to get her in the water. I told him I would think about it. Without an authoritative answer I would assume UV resin should be hardened up plenty after a few days in the sun (flipped regularly). But if I am wrong there I would love to know. I dont mind being a guinea pig and finding out the hard way, but would rather avoid it if possible after the effort to make this sucker! Thanks again.
Dude! That thing is Bonzer!!! Are you sure you’re a rookie??? Haha. Really man. Nice job.
just took a break waiting for the resin to come in today, but I’m glassing my 4 year old nephew a little paipo and had almost the exact same color plan and lay out you just did! Ha. Hopefully it turns out half that nice!!
hahaha, thanks but I don’t think it’s as good as the pictures suggest! It’s good, but there are flaws. If you look carefully you can see red colour mixed into the purple in a squeegee drop moment :D. I have probably done 7 or maybe 8 boards now and I do go to an OCD level of detail, often sanding off hotcoats and doing again (and sometimes again!) until I stop burning through to cloth! I think this board taught me something new … i am not going to use power sanders any more! I realised how nicely abranet cuts (wet) and I ALWAYS make some kind of mistake with the motorised sander! Also my boards were always pretty heavy due to more glass than normal and several hot coats when not happy with my sanding! No more of that though!
The colour job was a nightmare (for me anyway!). I love a single colour tint and don’t mind a random job, but with this one needing separate areas for apparently ‘random’ colourwork, it was trickier than I expected and definitely a leap too far for me although it certainly looks ok now. The biggest worry is whether he can surf the damn thing! He insisted on rails like knife edges and it’s pretty lean on volume. He will either love it, or hate it! Good luck with your job there, never heard of a paipo.
PS - And I STILL can’t fit damn finboxes in a way that avoids me hitting the glass around the openings. One day I hope to work out how to do that!
Indasa just like 3m makes numerous tapes and only a few of the tapes from each brand are suitable for resin work. I’ve used Indasa tapes before without issue but don’t recall the item number I was using. The only thing I remember about the Indasa that I used that I didn’t like was the roll I had was lite natural tan in color rather than green and was hard to see when I was doing my cut-lap.
I recently experimented with a 3M tape that is readily available at hardware stores and home improvement centers called 2060 Rough Surface because my local source for inexpensive 233 closed its doors. 2060 is a green tape that is heat and solvent resistant but the temp rating is not quite as high as 233. It sticks to foam and glass fantastic and in my experience is perfect for doing art and for glass work on clear boards. The down side is that with resin I did not get a perfectly clean edge like I would have with 233. There was an ever so slight bleed under the tape on my hot coats. I’m talking a millimeter of bleed but just enough that a pin-line or cutlap with it might not be a good idea. Because of that I would not recommend this tape for use with tinted resin or for resin pin lines.
With any tape, don’t just press it down into the foam or onto your glass. Burnish it down. By that I mean create a little heat in the tape using friction and pressure. Use a popcicle stick or a burnishing tool of your choice and give it a good rub at a shallow angle along the edge that will be in contact with the resin. A quick once over is not enough as you really want that tape mashed into the surface with pressure and some friction.
Your board looks good. Does look like you need to work on shaping your rails especially towards the nose of the board. Looks like you’re not tucked under much at all which likely will make it catch edges and make it a little harder to paddle into waves.
I only buy my Indasa tapes from Seabase which only sell them for surfboard building so pretty sure I have only used their chemical resistant variety, but I might try that tape. I had never thought of the heat/friction point, and being in the UK that could be a great idea to rub it rather than just push it down. Maybe it’s a temp issue, or maybe it’s old stock as was mentioned above. Either way, my bleeds are getting less and less troublesome, I hope one day to master a cut lap with strong colour to clear deck without need for a pin line, even though I love pin lines.
Which reminds me, I did experiment with tapes myself last year and found some fantastic stuff for pin lines, cheap from china on ebay, I think i searched “fine line heat resistant tape”. It was after I realised how excellent electrical PVC insulation tape was (no clean up, perfect pin lines if pull as soon as painted on). I bought a bundle of widths down to something like 3mm. I always lay one exactly where I want the line (i don’t have the “eye” or the hand control for perfect curves by hand yet!), then I put a strip either side, pull the inner strip, wipe quick with acetone to remove finger greases, slap it on and pull both tapes at 50 degrees (angle, not temp!). That stuff got me hooked on pin lines, and when I found out that gold fibreglass changes colour when you catch it with sander, I used a couple of rolls of tape doing a ridiculous (but fun) pin line arrangement to do another cover up job …
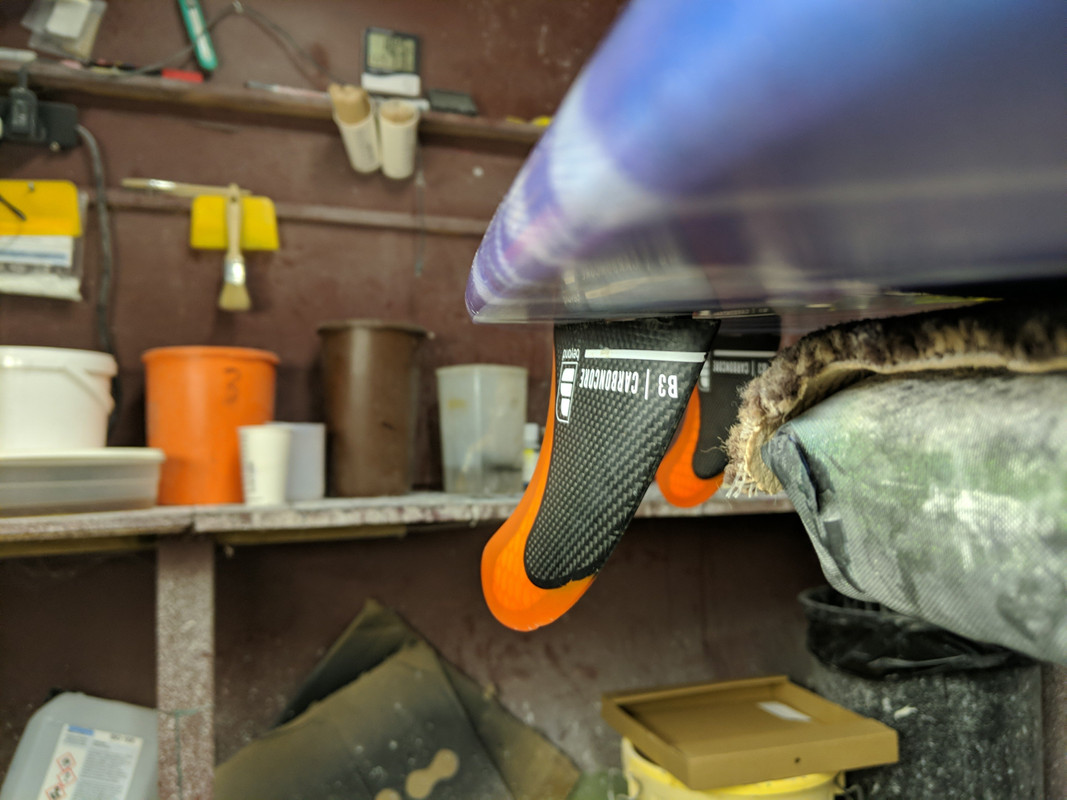
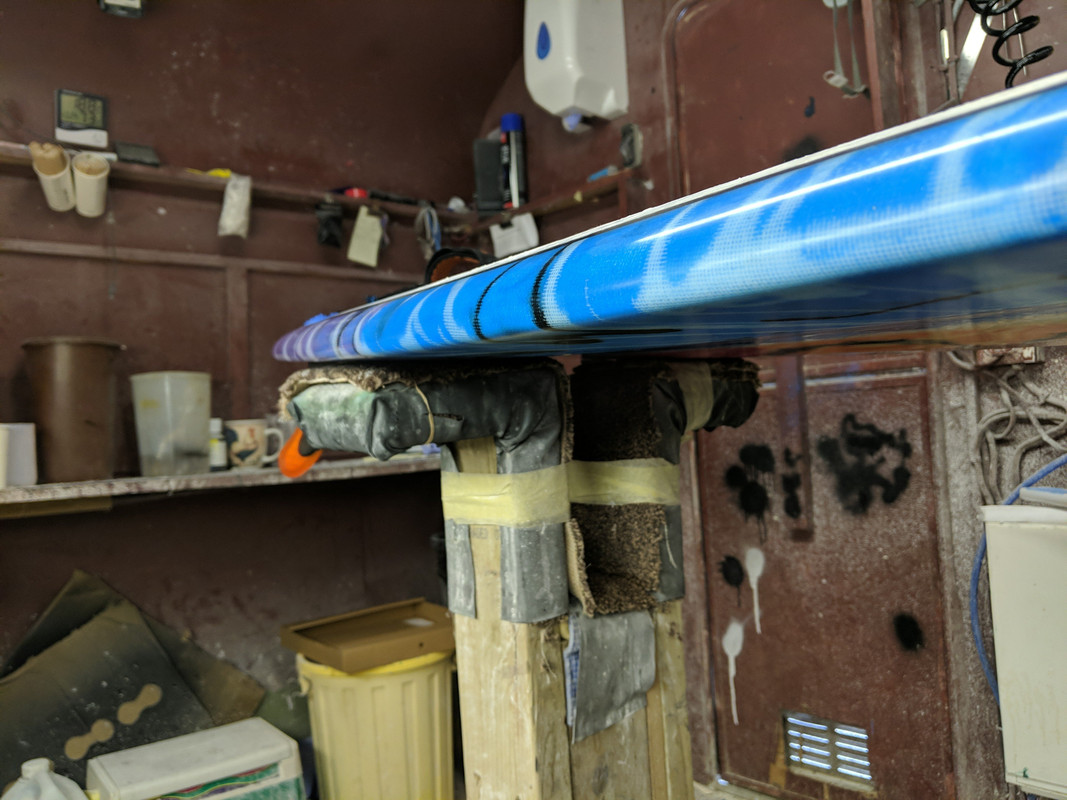
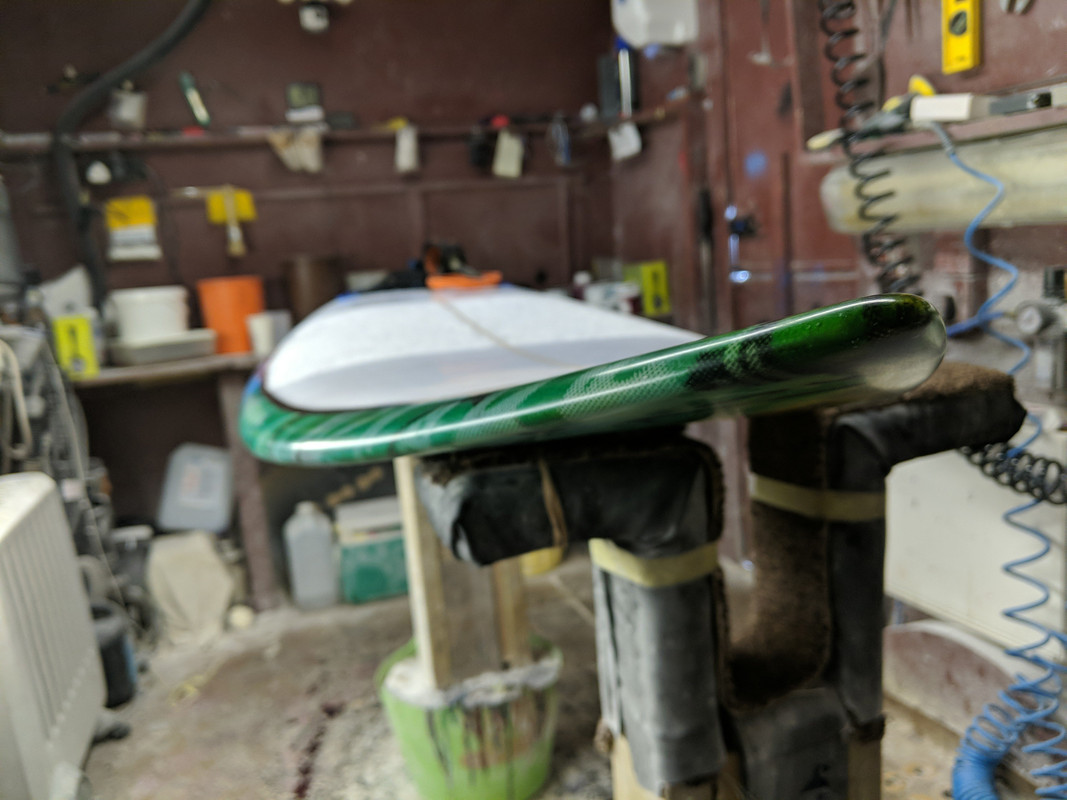
Re the nose - not sure what you mean there. The only part of the rails which isn’t tucked is the nose as he wanted it rounded (50/50 ish) at the nose but except for maybe the last 4-6 inches of the nose there is a serious tuck (very “down” rail), in fact I think he will really struggle to surf it but i hope i am proved wrong there! Maybe I am not understanding your point, but I want to so maybe you can clarify? here’s some more pics of the rails in case it helps, I welcome any criticism which helps me make em better!! Thanks again, oh and PS if you have any input on the curing time before she can be ridden I would love to hear your thoughts.
Could be the pictures but to my eye your rail line in the forward third of the board is way too low. Like you’ve got a hard down rail in the front half of the board. The easiest way to check this is with a piece of thin wire or lead solder. Use a board you’d like to emulate and then check it against the board you just completed. Bend the wire at different intervals. See how your board compares.
For this example I’ve used a Lost Rocket and the pictures below are at 6 inches and 18 inches from the nose. You will find that production boards that are successful have the rail apex a lot higher than you might have expected and that the rails towards the nose are fairly rounded. Hope this helps.