Well… I can’t say I actually solved the problem. I did a lot of searching on Swaylock’s and everywhere else on line, and I hink I settled on a solution that is worth sharing.
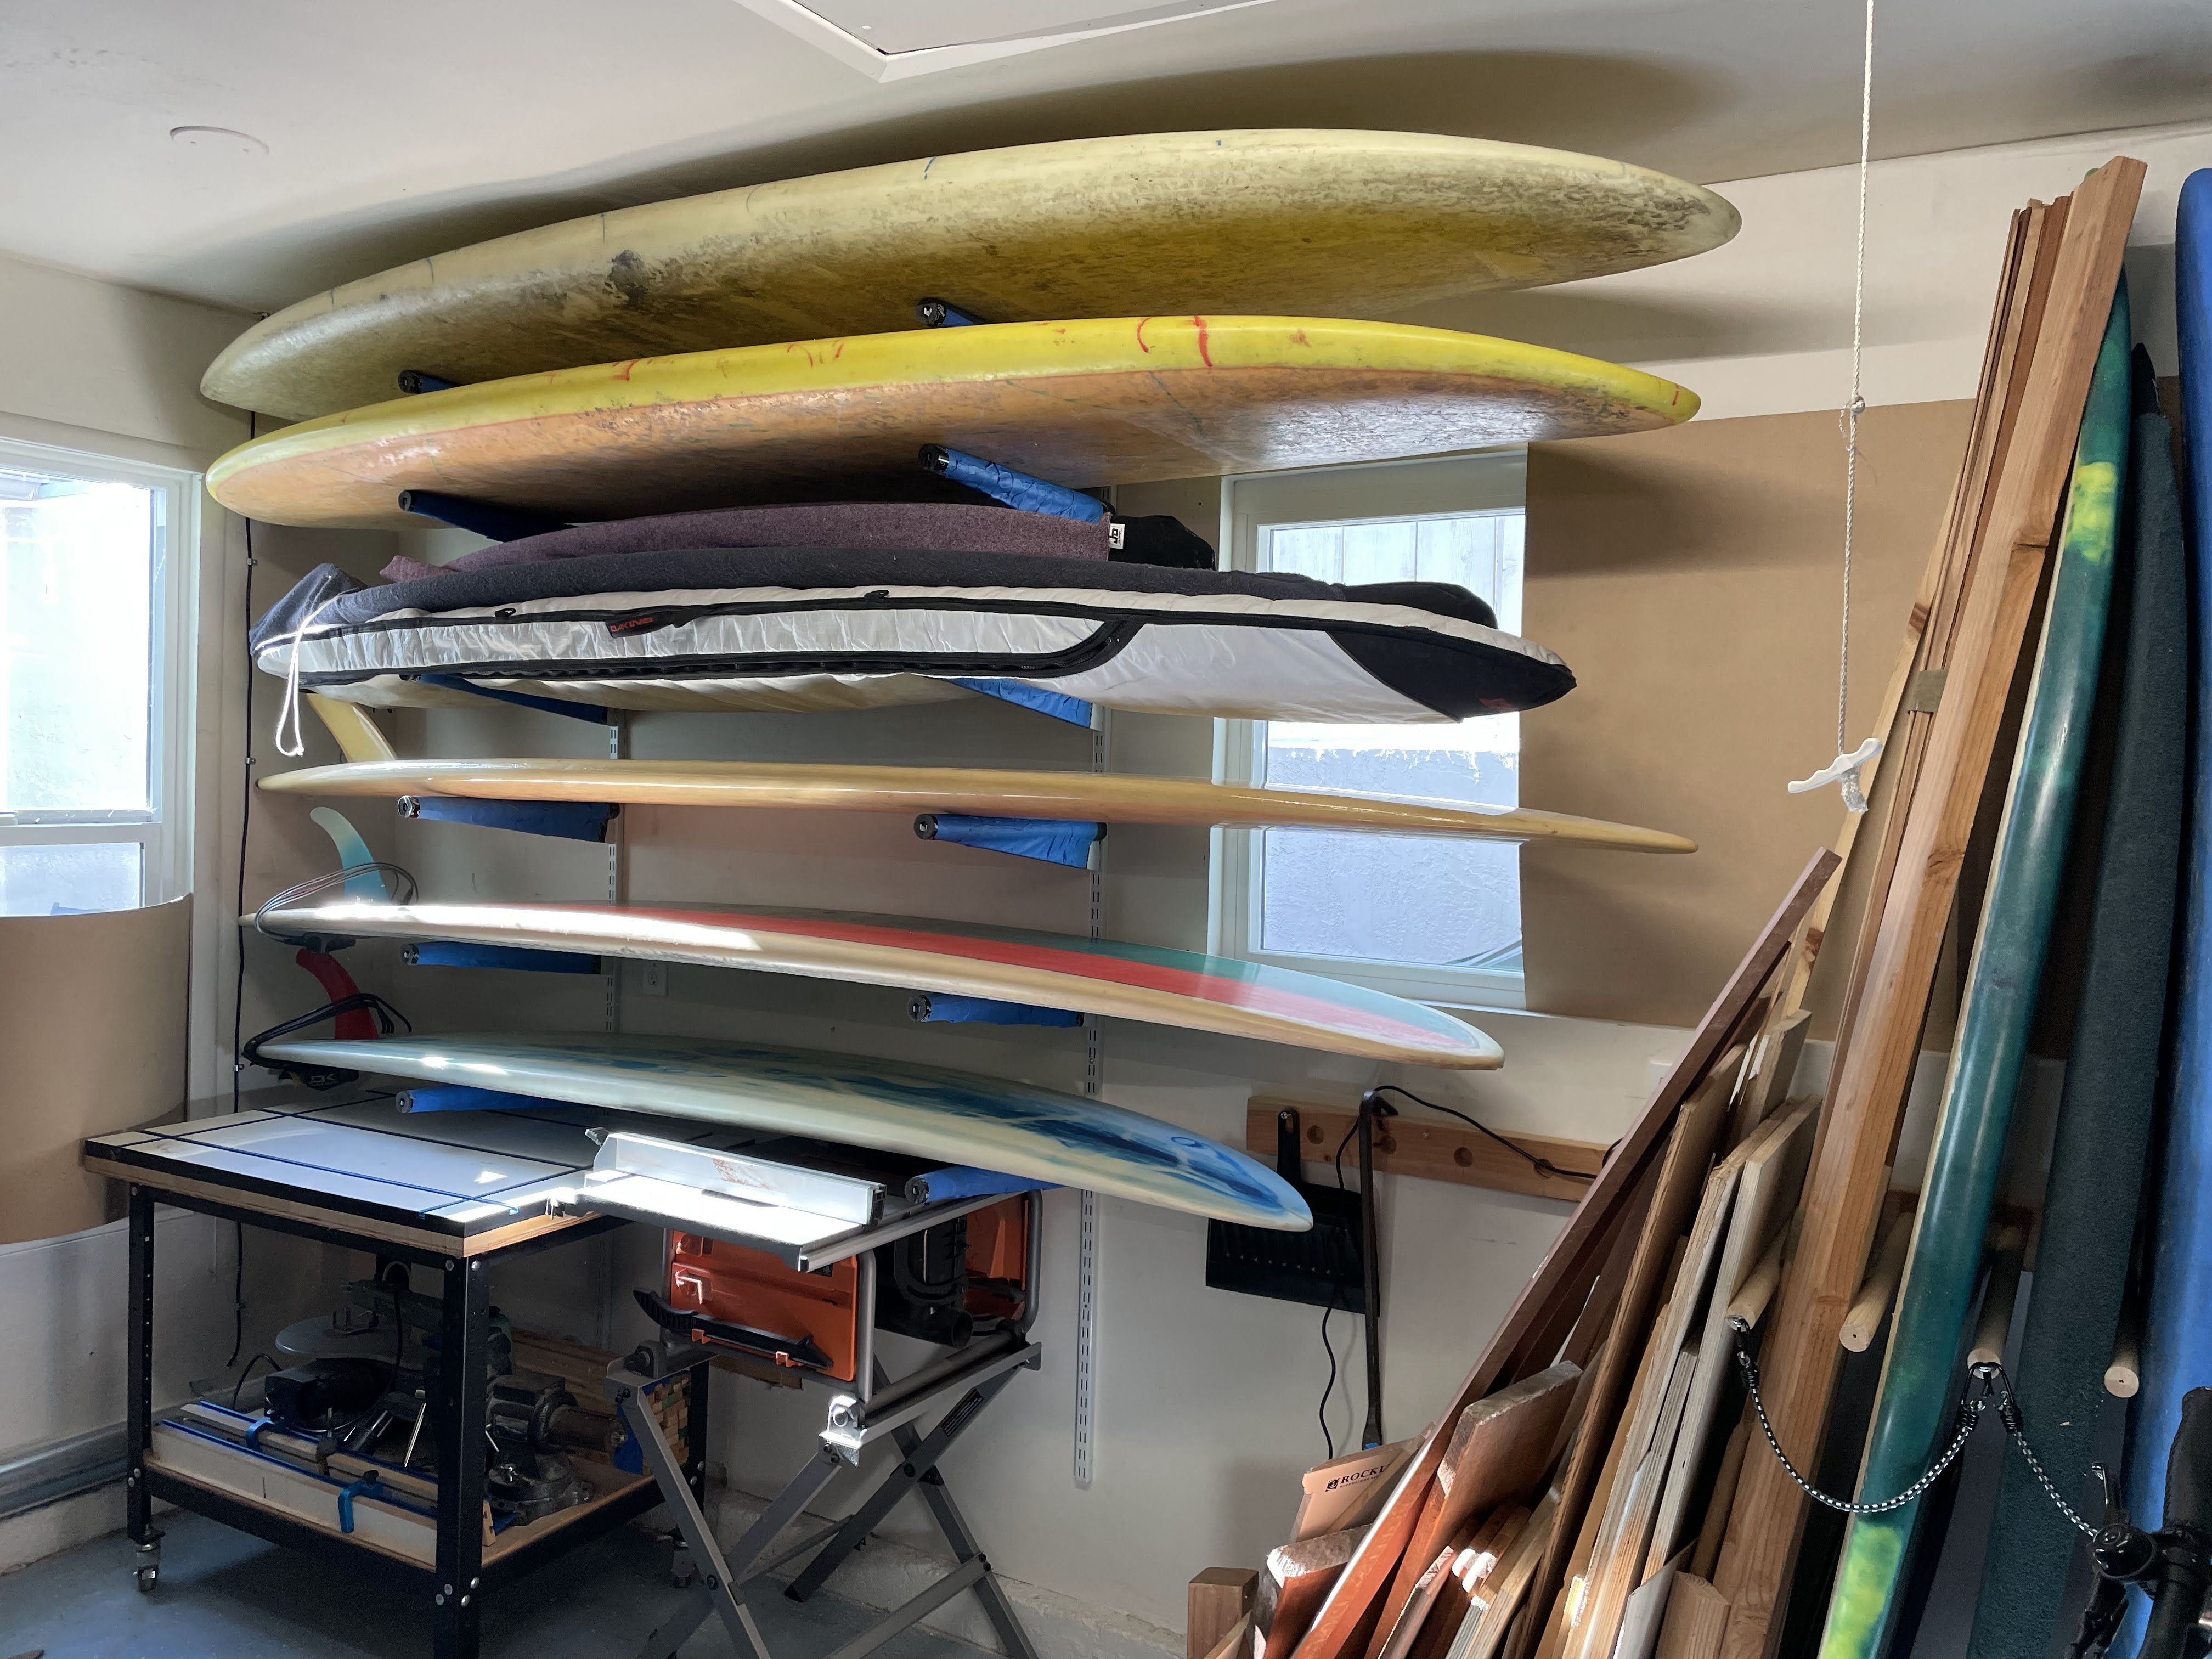
I moved into my new place last year, and there was a board rack already installed. I quickly overloaded it with boards, and rendered it non functional.
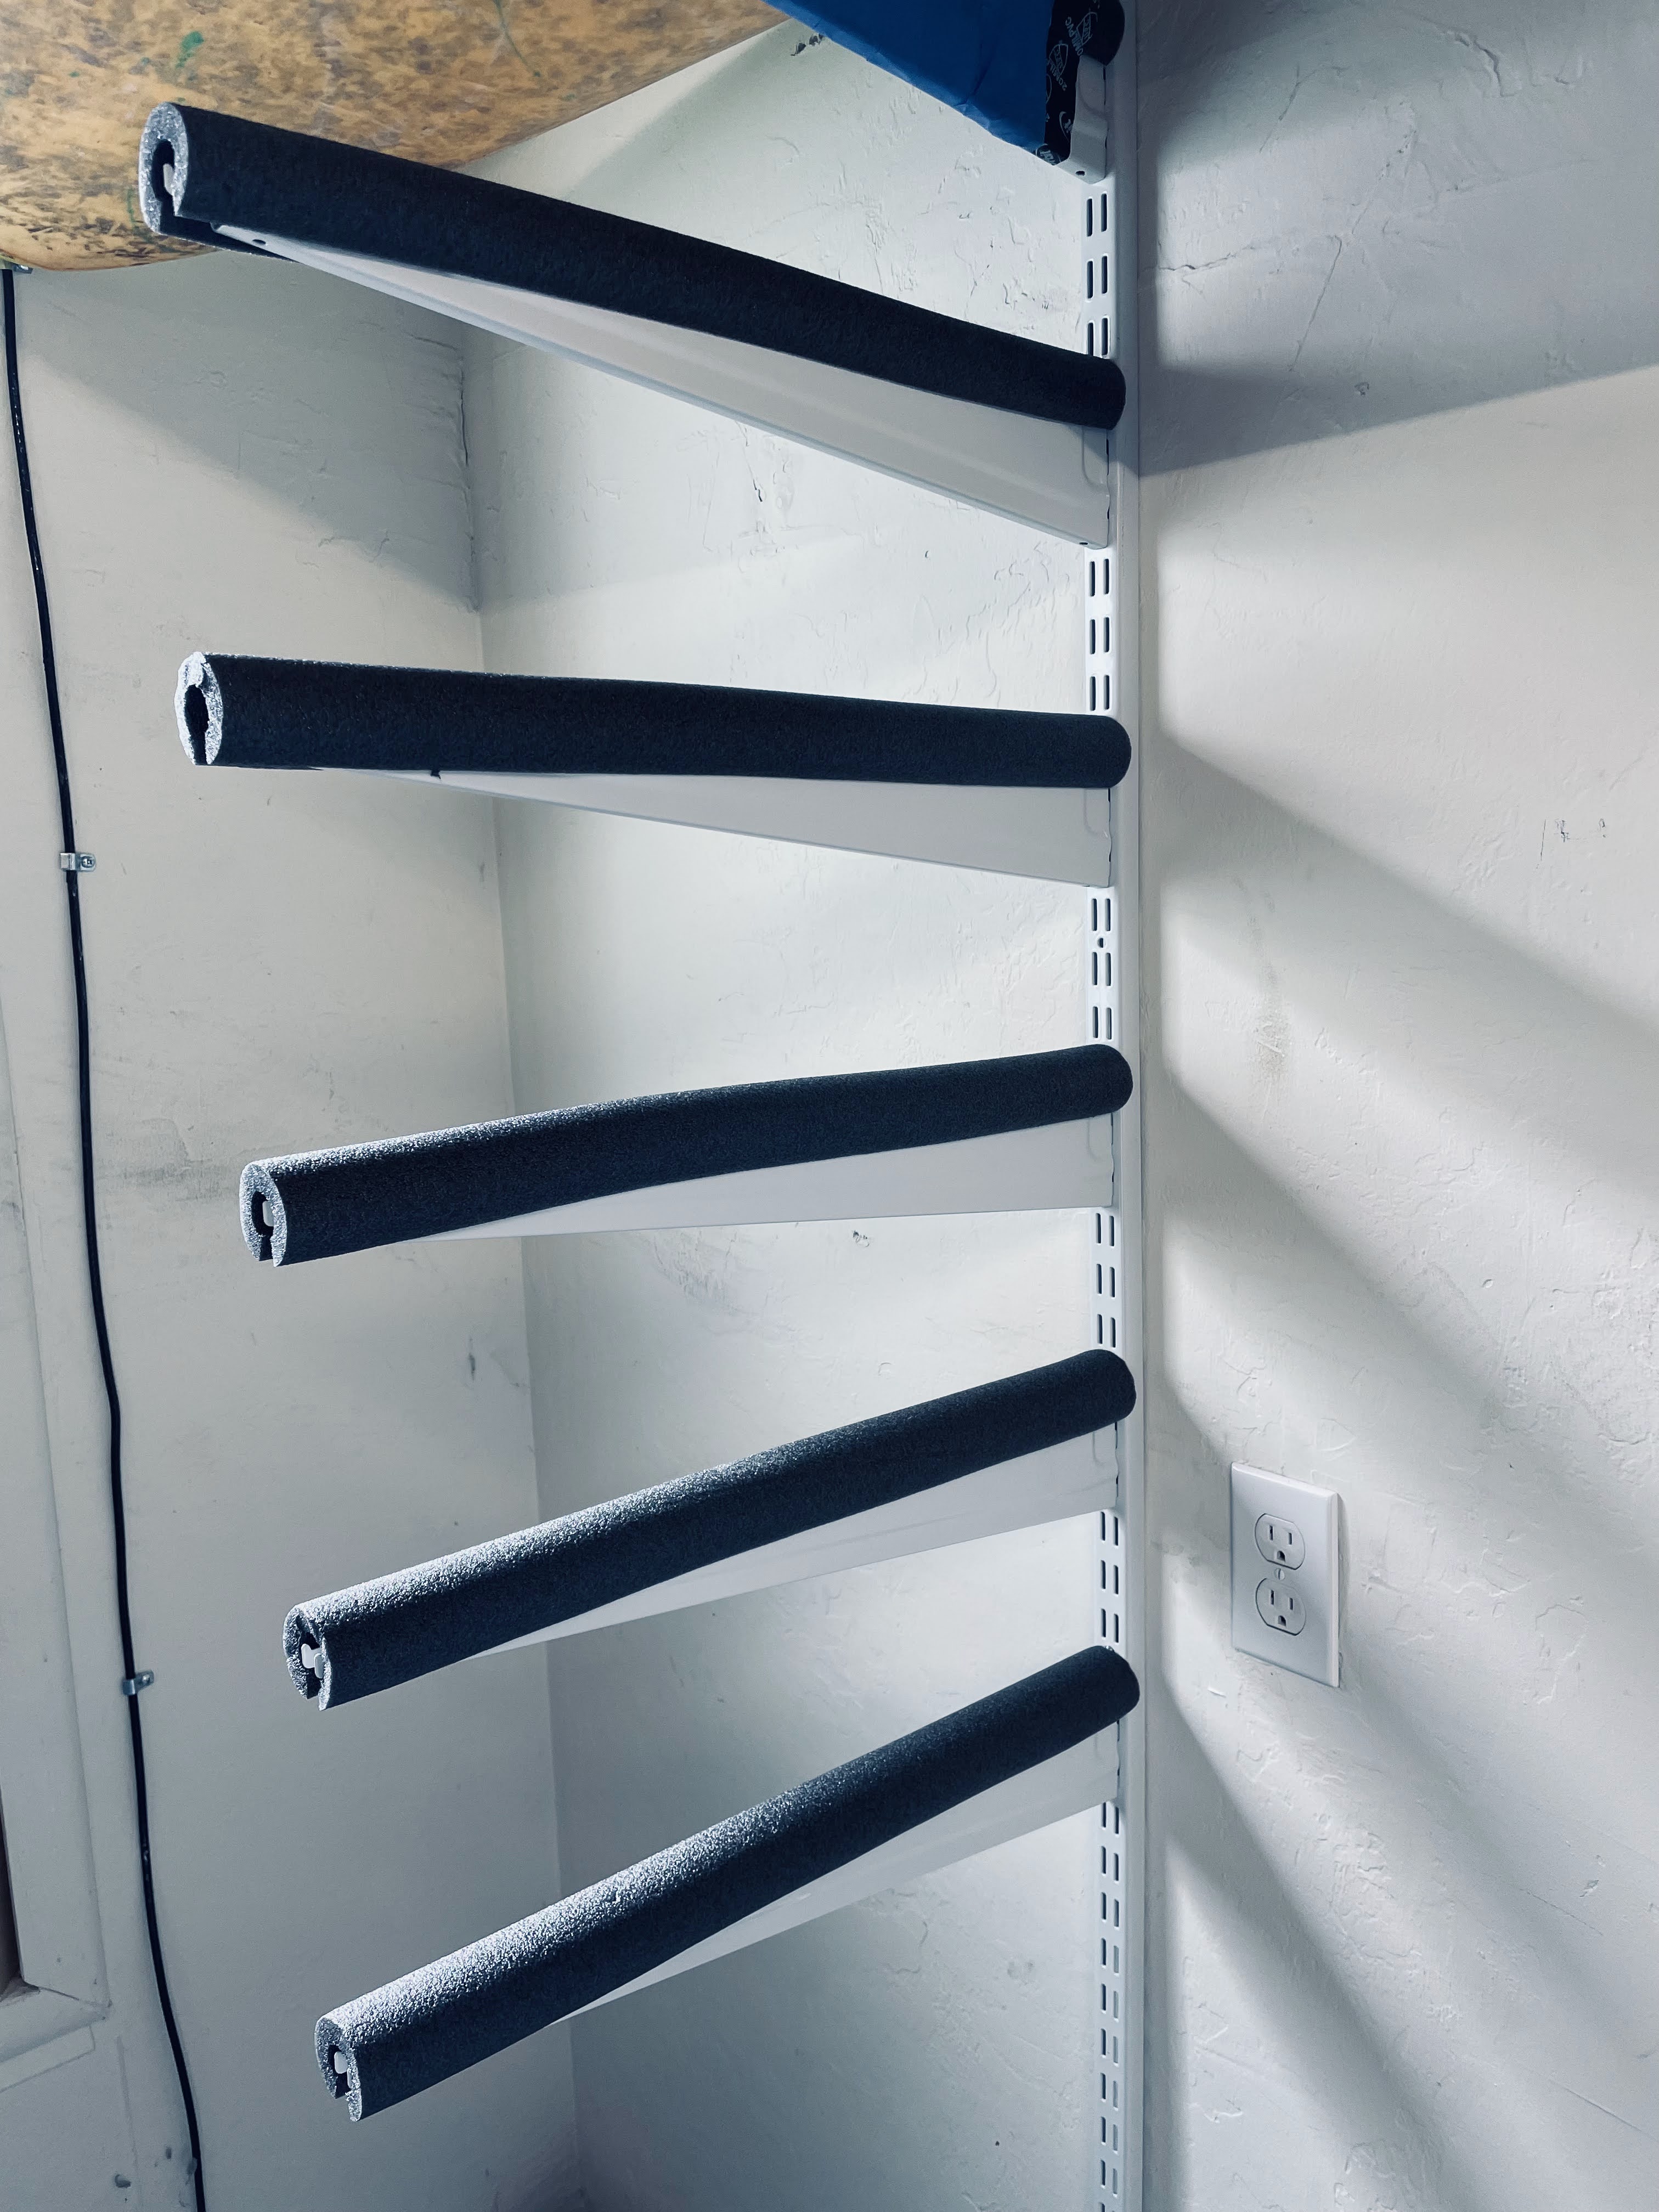
Use a bubble level to make sure that the top support bar is perfectly horizontal. I used a stud finder and put in wood screws where I could. I used drywall anchors for the rest of the holes. It feels really solid. I don’t think I’m going to have any more breaks like I had with the last system.
I also built a system for my short boards. I didn’t take any pictures while building, but heres the final result. I just drilled some holes in a 2x4 with a forstner bit, glued in dowels, and secured it to the wall.
A nice feature of the horizontal rack systems that I build is that it sets the boards perfectly horizontal. This is nice if you only get around to glassing on side of your board, and you need to move it off of the glassing stands until you get around to doing the other side a few weeks later. If you put it on a nice flat rack then you won’t have to worry about an uneven or titled rack putting a twist into your board.
There will almost always be a stud right next to a wall outlet, since those get mounted on studs by default. Once you locate that first one each stud will be 16 inches on center from the next.
Some older houses that have 2x6 exterior walls will have studs at 24 in. on center, but 16 inch is standard.
Also, another finish carpenter’s trick- sheetrock isn’t always done perfecly, especially in garages and utility areas, so that wee depressions or similar changes in texture over fasteners may indicate where the studs are.The magnetic stud finders, not so great. There’s a lot of steel in a wood building besides nails and you don’t want to be sending a fastener into a conduit with wires in it, for instance. The lights go out, your sander won’t work…you get the picture.
Fasten with screws rather than nails, preferably Torx/star drive screws. Phillips screws go in once before they strip the cross head, that’s what they were designed to do. Square drive simply suck. You may move someday. Or want to move the rack.
When I was doing production ding repair I made up a couple of free-standing horizontal racks of soft sawmill pine, though spruce would work too. No need for rubber or carpet pads, about six feet tall, X-braced. light enough to pick up and carry if need be, undo a few screws and stash in a corner in the off-season.Horizontal, so I could glass, lightly sand and gloss a lot of smaller repairs without tying up my main repair stands.
Yes, stud finders can give squirrely readings. I actually have two stud finders. I lost the first one… bought another… found the first again… now have two. The more expensive one is actually much worse at locating studs. I use the cheap one for studs. The more expensive one has an electrical sensor, which is obviously important. I never trust a single reading. I take many readings at multiple points on the wall and mark the edges off with a pencil. Pretty soon I get a clear idea of the exact location of the stud.
All of the load is carried by the horizontal “hanger track” at the top. This gives you the freedom to slide the vertical tracks to hang wherever they work best for you. The holes on the horizontal hanger track are spaced out 16" apart. Once you find the first stud, then the rest of the studs will also line up properly.
Here’s a Youtube video on installing this kind of system. I bought a different brand, but it’s the same process:
I’ll have to warn you. Once you start installing these hanger/shelving systems it becomes an addication.
I had a bunch of home despot gift cards sitting around that I hadn’t gotten around to using. I kept going back, again, and again to buy more brackets, shelves and hanges. All in I probably ended up spending around $500. But, now all of my junk (which I probably should have just sold anyway) is off of the floor.
My solution for horizontal storage was 2, parallel, vertical 1x4s (or 1x6s), paired 3/4" galvanized floor flanges and paired, threaded 3/4" x 24" galvanized pipes – as many pairs as boards you need to stack. Foam pipe insulation added for padding.
I ended up structurally modifying it to use 1" galvanized fittings/pipe and used it for horizontally storing (3) kayaks instead (140 lb). Makes it much easier to access my boats than when they are in wall-strap, and ceiling-strap slings.
Plan to add a few extra levels on top of the kayak racks for boards. For now, the boards still use their original kayak slings as well as the now vacated kayak wall and ceiling slings.
I have been meaning to add some storage for blanks above my side lights in my shaping bay. One way I have seen glass shops and other shapers do this is by making use of cheap wrought iron rail sections that are sold at Home Depot and Loews. I think the sections come in six ft. Lengths and are 36" high. What guys do is Sawzall or Angle grind one section into two halves. This will give you a section with 18" “arms”. Each section can then be halved into 3’ sections. When I get around to doing this I will post some pics. First shop I ever saw do this was Aloha Glass. They don’t like to sell Wrought Iron up here in the NorthWest so these rail sections are special order. You can walk right in and buy them in Southern California. You can cover them with pipe insulation and put a small chair leg rubber on the end of them. They can be drilled and installed on the wall with a lag bolt. Lowel
I think it is well worth the price. Sure, you can maybe go cheaper with 1x6 lumber, or wrought iron. But this system is (1) super easy to install, (2) super strong, (3) will last forever, and (4) can be adjusted at any time to fit kayaks, lumber, or whatever else you wish to store.
I have 3 board racks that can hold a total of 20 boards, but I still have about 20 boards laying under my house. I can’t store boards over 7-4 vertically, so I have a rack/shed that I made for the longer boards. They lay horizontally and I used dowels on one end that have skate board bearings to easily roll the long boards into that rack. One rack is made from large PVC pipe, and I can easily take it apart if I ever want to. The PVC pipe was very inexpensive, but the connectors add up.
My small board rack (7’ or less) holds boards vertically and is on casters. I have it indoors and it can easily be moved around if needed.
I used to have racks with dowels like your photo, but they fail over time, and if you put too much weight on it.
Yes, PVC fittings are expensive. Heavy when you have a lot of them And once you glue it up, there you are, literally stuck.
On the other hand, 2" or larger PVC uprights and 1" horizontal pieces plus the judicious use of a hole saw and ideally a drill press and there you go. Ladder-style. Shoot for a snug tap-in fit, they make lots of different size hole saws… And if you don’t trust 1" PVC pipe, go bigger, with bigger uprights. Precise measurements are the key.